
Sending Invitations
Follow these steps to send your finalized mailing to your invitees
-
Click “Preview” to double check that you are satisfied with your final email template.
-
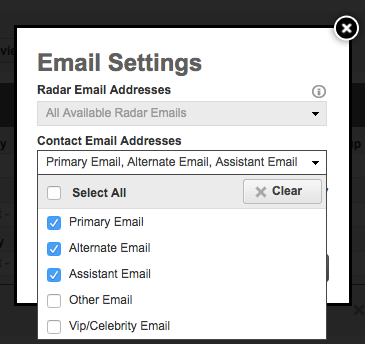
Click the “Settings” button to select which email addresses you would like each contact to receive their invitations (primary, assistant, etc.)
-
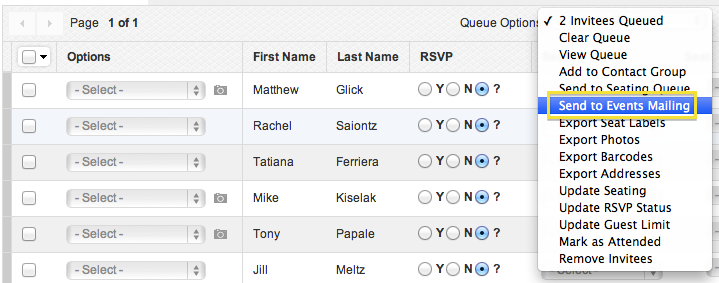
Go into Invitees Manager and queue the invitees you wish to send your mailing to and then from the Queue Options drop-down menu select " Send to Events Mailing". This will redirect you to the Events Mailing page.

-
Click the “Import Invitee Queue” button to populate all queued Invitees at the bottom of the page.
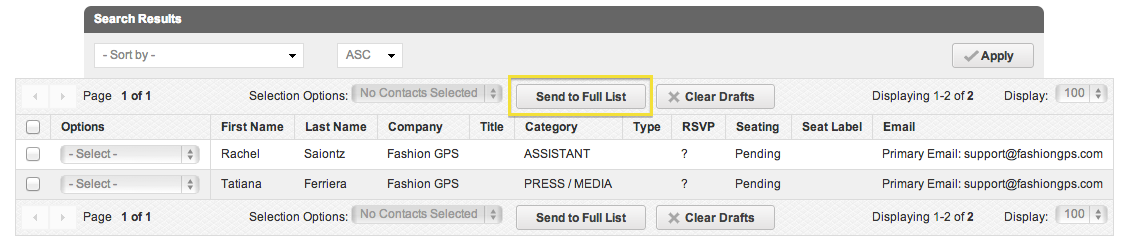
- Either individually queue up recipients and select “Send Email” from the Queue Options drop-down menu or click “Send to Full List”.
-
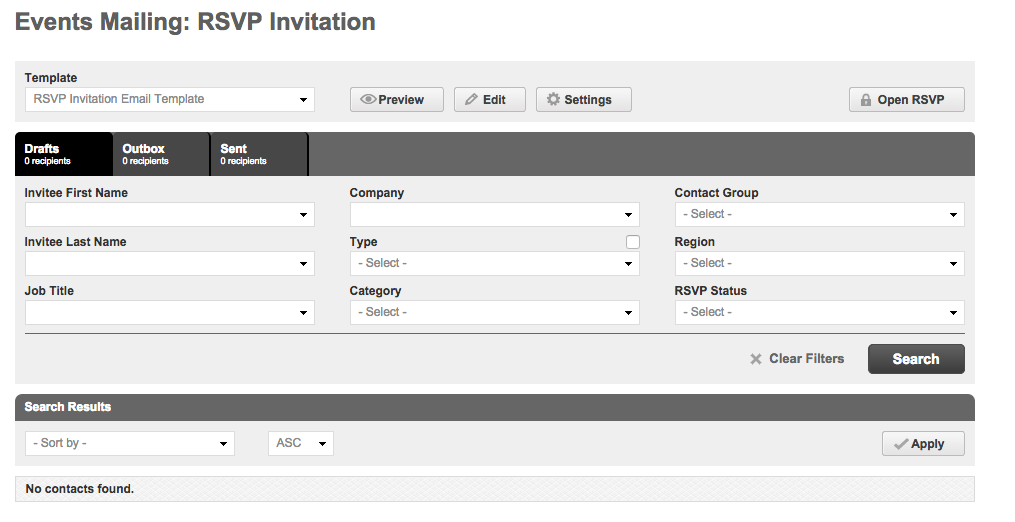
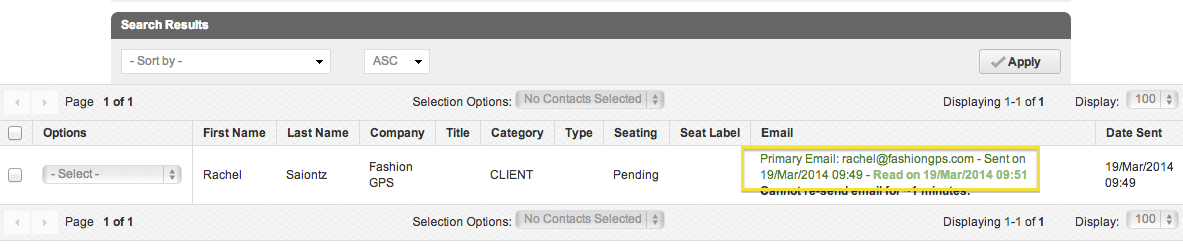
Monitor the status of your mailings in this same page.
-
Outbox tab:Shows all emails that are in the process of being sent out. They have not yet left the system.
-
Sent tab:Shows drop down of delivery responses.

- Delivery Response: Allows you to search via the status of your emails.Processingmeans that the Fashion GPS server is awaiting confirmation from the email recipient's server on the delivery status.
- Check out this Support Article that providesFailed Email Explanations.
-
Sent tab:Shows emails that have been confirmed as successfully sent. You can review the sent email.
Commenti
0 commenti
Accedi per aggiungere un commento.