
This article is for users who are new to Launchmetrics' Samples, and who need a general overview of the app and how to get going.
1.0 | Purchase Hardware
Sample labels are an integral part of the Samples app and is key in ensuring accurate tracking of your inventory. Before diving into the Samples app, ensure that you have ordered the right hardware for your sample tracking needs. The exact hardware you will need to purchase will depend on how you and your Launchmetrics Implementation Specialist or Customer Success Manager have defined your setup.
This article outlines the hardware needed for traditional barcode printing and scanning. Purchase links can be found at the bottom of the article
This article outlines the hardware needed for RFID printing and scanning
1.1 | Hardware Setup
Once your hardware has arrived, you'll need to install it onto your computer and configure your site to print to it.
Printer Setup Overview ➝
This article outlines all of the steps required to install and connect your printer to your Samples app. Note that you may need your company's IT for help along the way.
You can choose to customize what fields are printed on your barcode label. Speak to your Customer Success Manager or Support Specialist for more information.
This article outlines the steps to install your RFID Printer
This article outlines where to find the mobile app and what features are available on it.
2.0 | Site Configuration
This step may require the help of yourImplementation SpecialistorCustomer Success Manager.
Below outlines the types of things you mayneedorwantto configure before getting started.
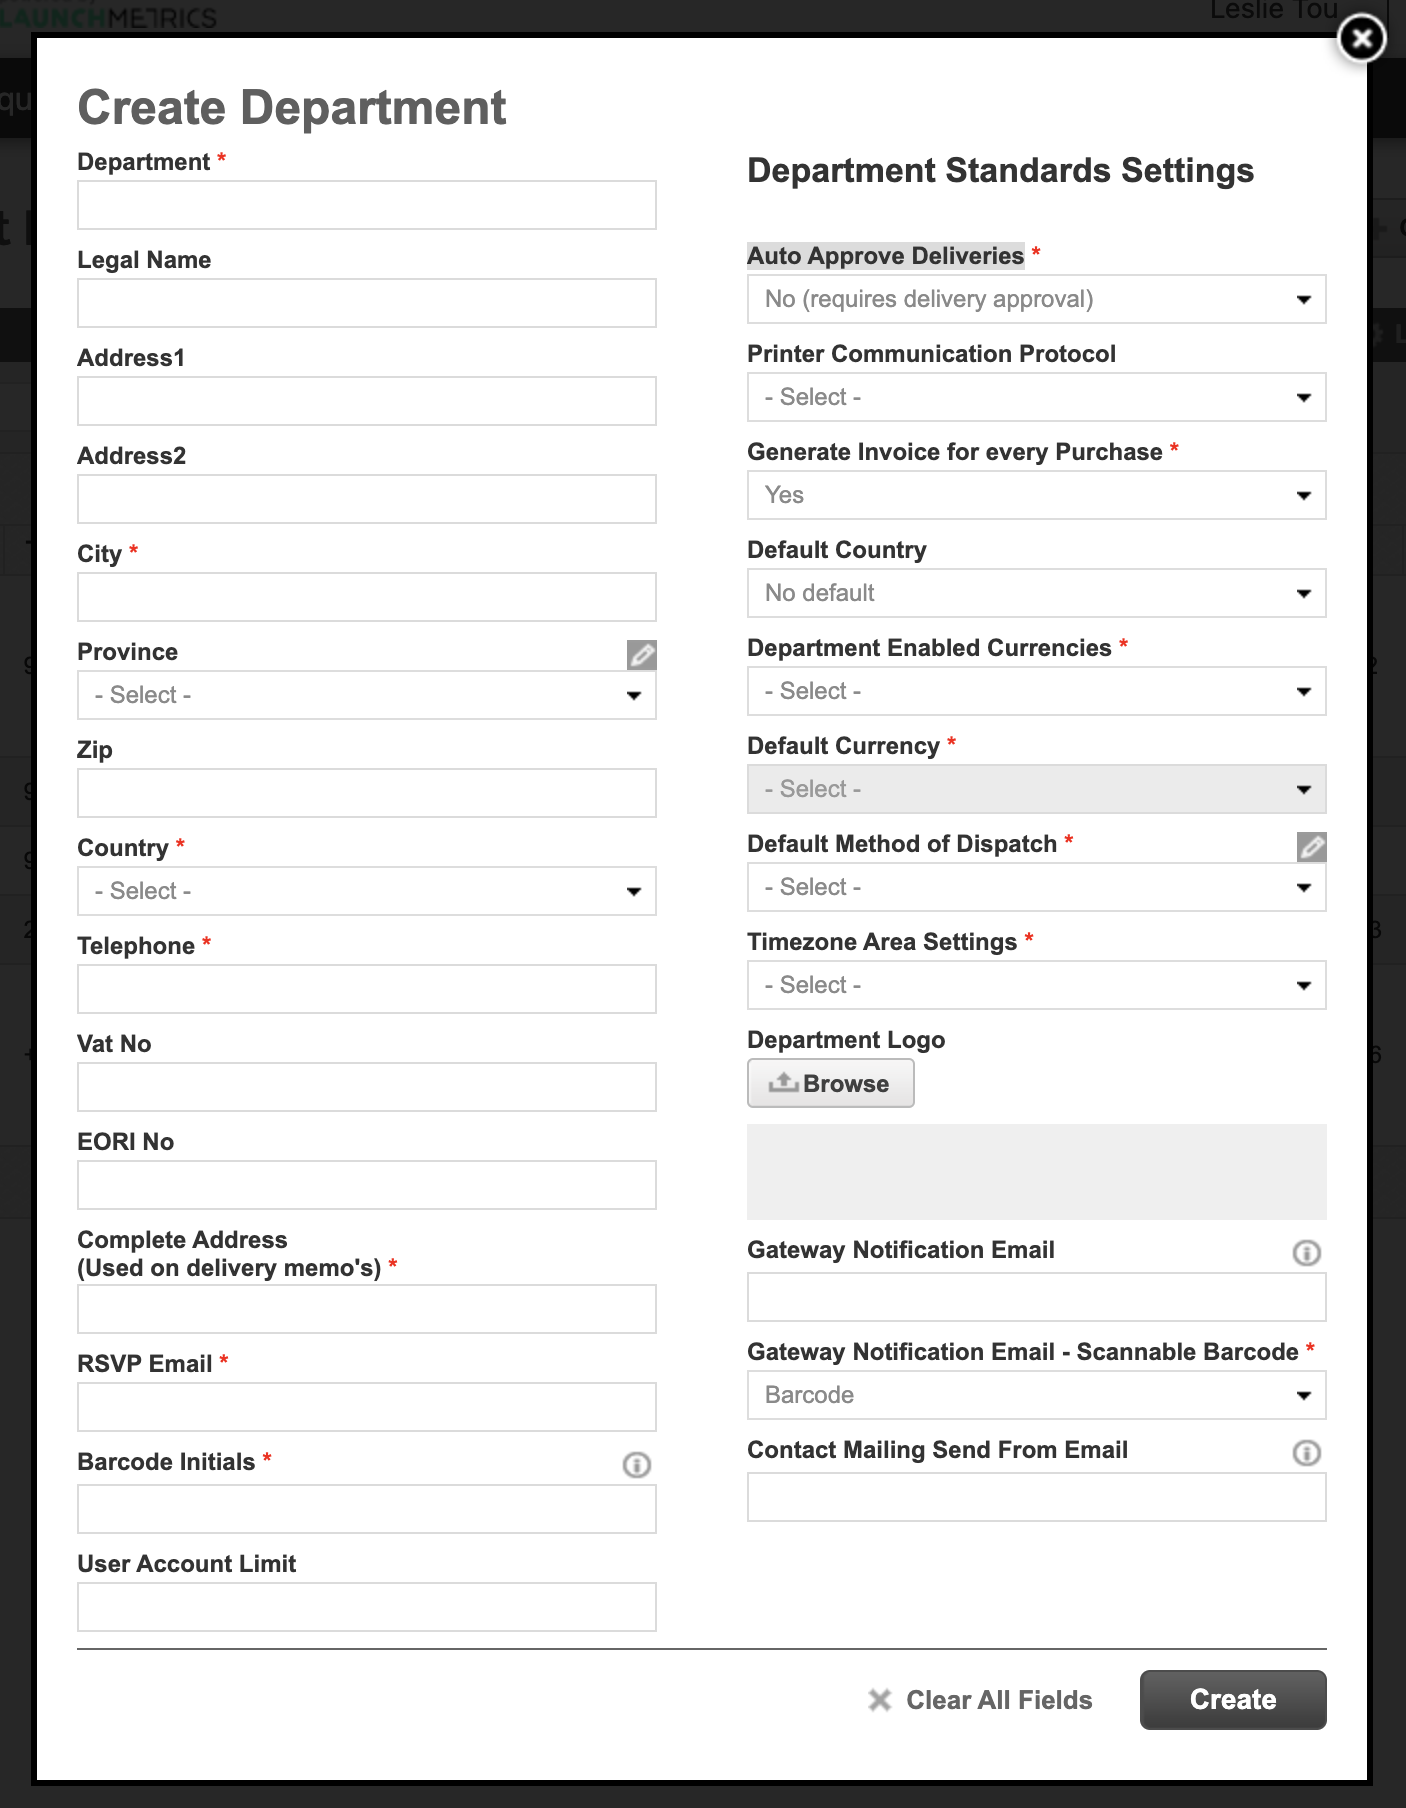
2.1 | Departments
A department is defined as a particular grouping of inventory samples. Typically this is defined at the team level. Some examples of departments are as follows:
- By Location:New York Showroom, Paris Showroom, Tokyo Showroom, etc
- By Product Team:Womenswear, Menswear, Leathergoods, etc
- By Department:Sample Library, Merchandising, PR, Marketing, etc
There are additional configuration options that are available to set at the Department level.
2.2 | User roles & privileges
Users can be assigned to a single User Role. A User Role controls the permissions that user have. The Samples app comes with a default set of User Roles but they can be fully customized.
A User Role can be assigned to an Account Type. An Account Type controls the navigation configuration for those User Roles.
Learn more about User Privileges, Roles & Account Types ➝
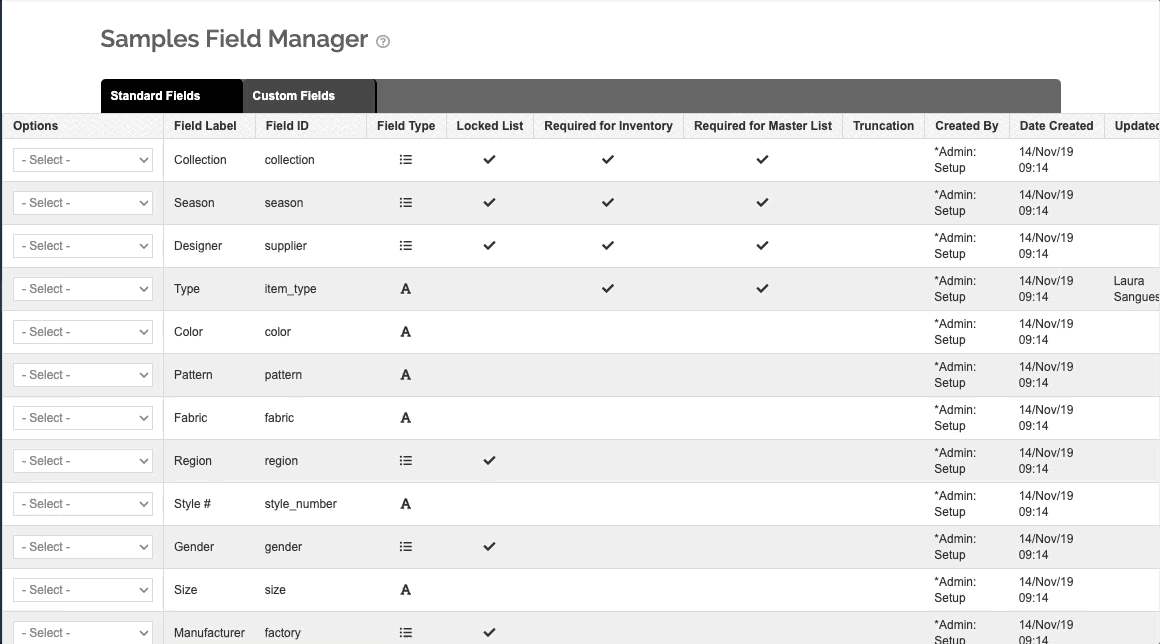
2.3 | Sample Data Fields
You may want to customize the Sample data fields that are available in your Samples app.
Find the Sample Field Managerwithin your username dropdown menu.
You must have the right user privileges in order to see this option.
Here you can alias your fields, define which fields areLocked List, Required for Inventory, Required for Master List, you can also add custom fields.
2.4 | Sample Scannable Fields
Additionally, there are4 optional custom scannable fieldsthat can be used in addition to or as an alternative to the Launchmetrics Barcode when scanning. These must be enabled by an LM admin.
- Custom Barcode
- External SKU
- External RFID
- External Serial
2.5 | Master List
Think of the Master List as your product catalogue. The Master List is department agnostic and requires a single unique identifier. The default unique identifier is SKU, but you can choose whatever code you prefer.
Master List can only be enabled by your Launchmetrics Admin.
Additionally, you can choose to enableMaster List Cascade effectwhich would push any updates from the Master List to live inventory. You can precise which fields you want to cascade.
2.6 | Sample Prices
You have the option to enable currencies at the site & department level.
Learn more about Sample Prices & Currencies ➝
3.0 Importing Samples
Launchmetrics offers several ways to import samples. Each import method have their own level of flexibility
Learn how to manually create samples ➝
This method should only be used for ad hoc sample creation. Master List Samples cannot be created this way.
Learn how to use Excel Import ➝
The most common way to import by downloading a blank template and then re-importing it.
Learn about importing via FTP integration ➝
FTP importing supports themapping of columns to fields,field defaultsandformulas.
API integration
Requires developer resources to build custom connectors. Speak to your Customer Success Manager for more information.
3.1 Verifying Sample Inventory
Imported inventory represents samples that are not in your physical possession but you expect to receive. This can be in the form of a purchase order or a delivery from your supplier.
Depending on how you imported you may be required to pass through this step.
As with importing, there are several ways to verify inventory
Learn how to verify inventory via Sample Manager ➝
Learn how to Verify Import via the Samples Mobile app ➝
Scan to Verify
This page must be enabled by your CSM and allows you to scan the barcode in order to verify into inventory. Once enabled, you should find it in the main navigation underImport>Scan to Verify
3.2 Copy from Master List
Utilize your Master List when you need to create new inventory. There are 2 ways to copy from Master List
Sample Manager
UnderSample Status, chooseMaster List.Queuethe samples you wish to copy into inventory. In theQueue options dropdown, clickCopy to Inventory, define thequantity.
FTP integration
You can create a mapping using the processing engine calledCreate Inventory from Master List
4.0 Managing Looks
If you use looks in your workflow, you can define what looks belong to your samples.
Learn how to create new Looks ➝
Learn how to plan your Requests using the Look Calendar ➝
5.0 Create a Send Out
Send Outs actually perform several functions but at the most basic level they allow you to create sample deliveries from one place to another.
Learn how to create Send Outs ➝
Learn more about Delivery Memos here ➝
5.1 Create a Request
You may choose to start your workflow at the request level. Using Requests could serve several functions.
- You can use it to track what samples were requested (vs what samples were actually sent).
- You can use it as a layer between the team that is requesting the sample (for either internal or external use) vs the team who are responsible for fulfilling it such as Warehouseor Showroom
Learn how to create a request here ➝
Learn more about how to use Request Manager here ➝
Learn about how to convert a Request to a Send Out here ➝
5.2 Returning/Receiving Samples
When processing returned or received samples from another department, scan the sample barcode or delivery document barcode to confirm samples.
Learn more about returning samples here ➝
5.3 Checking Overdue Samples
Part of the Sample Management job is chasing borrowers to ensure they are back in time for the next shipment.
Learn more about managing Overdue Deliveries ➝
6.0 Reporting
Understanding your sample usage can provide powerful insights into your Sample usage to help you be more efficient and effective in your work.
Learn more about the Sample Performance Report ➝
This report provides aggregated data about sample usage
Learn more about the Send Out Report ➝
This report provides a detail of every sample sent out
Commenti
0 commenti
Accedi per aggiungere un commento.